Start with the shape you want to keep
Hand sanding can refine a wooden part before assembly or finishing, but it can also change its shape. A narrow strip may become thinner at one end; a crisp corner may soften without you noticing. Before reaching for abrasive paper, identify the surfaces that need smoothing and the edges that should remain sharp. Look across the wood under a light to spot saw marks, scratches or high spots, then decide which marks need removal rather than sanding every surface by habit.
Check that the part is securely supported. A small piece that rocks or slides encourages uneven pressure and puts fingers close to rough edges. A clamp with protective pads, a bench hook or a nonslip surface can help, provided it leaves the area you are sanding accessible. Move or reclamp the piece as needed instead of trying to reach awkward faces from one position.
Use a backing block for flat surfaces
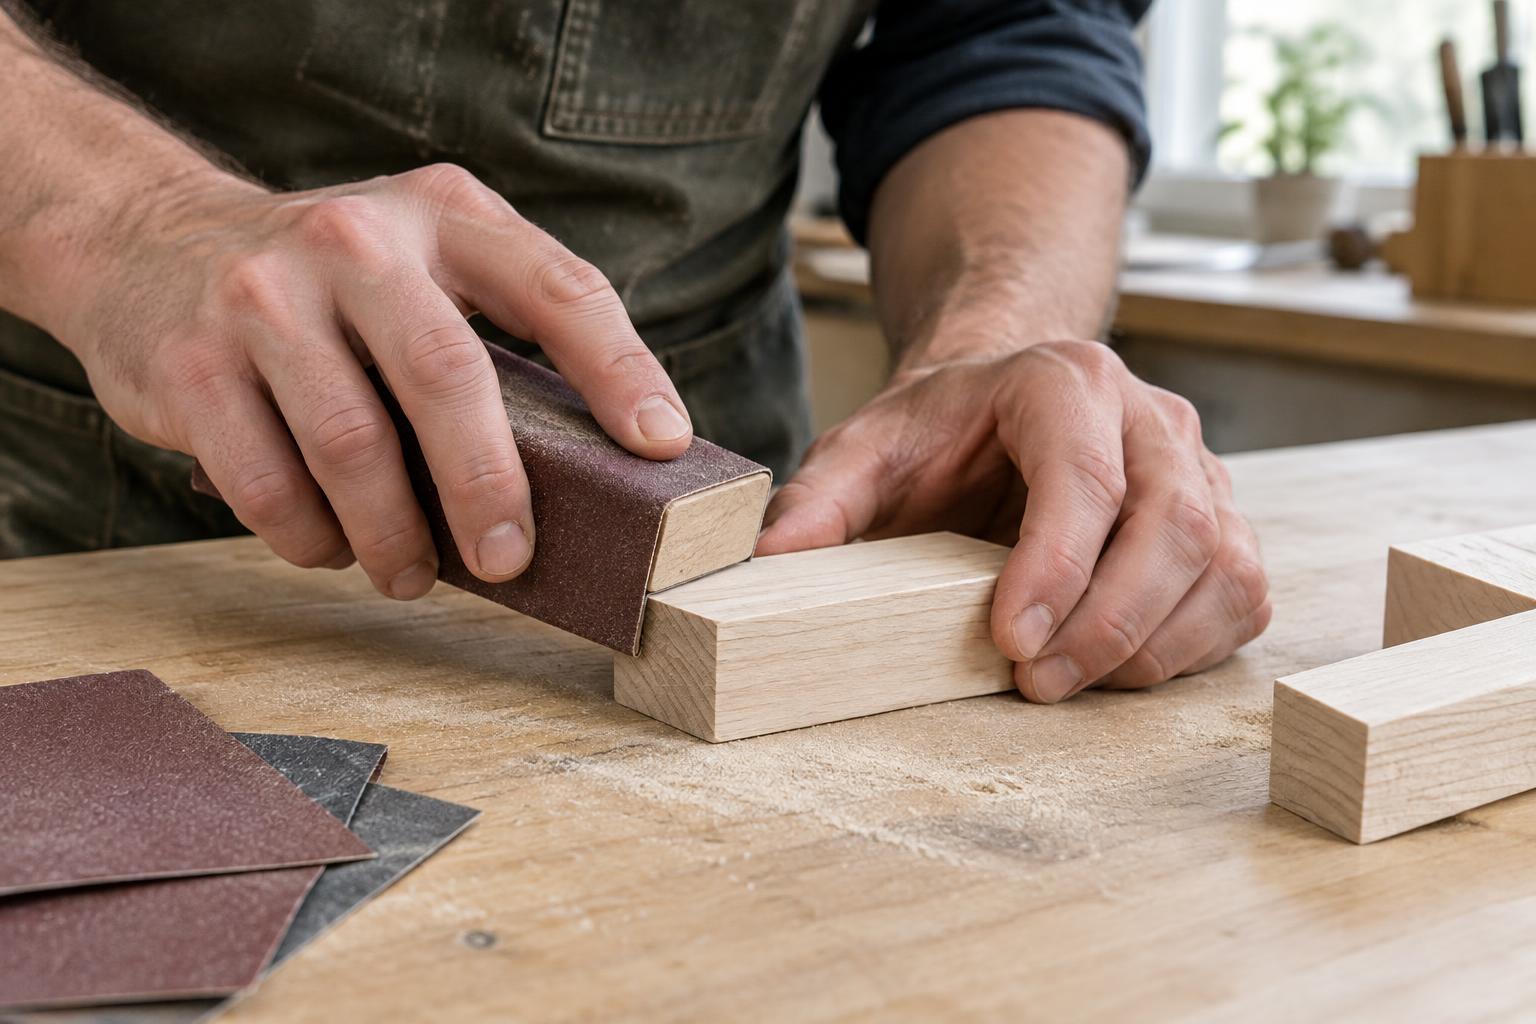
Abrasive paper held only by your fingers bends around the wood. That flexibility is useful for curves but makes it harder to keep a flat face flat. Wrap the paper around a small, level block when sanding straight surfaces. A firm block spreads pressure more evenly; one with a little give may suit a gently contoured area. Keep the abrasive taut so a loose fold does not leave an unexpected scratch.
Choose a block that fits the work. If it bridges over a hollow you intend to smooth, a smaller block may give better contact. For a narrow edge, use short, controlled strokes and check both ends of the part often. Avoid pressing harder to remove a stubborn mark: excessive pressure can tilt the block or wear one area faster. A coarser abrasive, used carefully, may be more effective.
Choose a sequence rather than skipping to a fine grit
Abrasive grit describes the size of its cutting particles: lower grit numbers generally remove material faster, while higher numbers leave finer scratches. Start only as coarse as the surface requires. A reasonably clean cut may need little more than light refinement, whereas a visible saw mark may call for a coarser first step. Progress through intermediate grits rather than expecting very fine paper to erase deep scratches quickly.
Each stage should remove the scratches left by the previous one. Wipe away dust and inspect the wood in good light before changing grit; lingering scratches can be harder to see once a finish is applied. Replace worn or clogged paper instead of bearing down on it. Test your sequence on an offcut of the same wood when appearance matters, since different woods can respond differently to the same abrasive.
Follow the grain and protect the edges
On a straight-grained face, make your final sanding strokes along the grain. Scratches across the grain are often more noticeable, especially after the surface is finished. Where grain direction changes around a curve or joint, work in small areas and adjust the stroke to the local surface. End grain may take longer to smooth than an adjacent face; check it separately rather than continuing to sand the face while you work on the end.
Edges deserve deliberate treatment. If a design calls for a crisp edge, keep the backing block level and avoid letting it roll over the corner. If a slight softening is wanted, make a small, consistent pass along the edge instead of rounding it incidentally while sanding the faces. Compare matching edges by sight and touch, without relying on your fingertips alone to judge whether their profiles are even.
Check the surface before finishing
After the final pass, remove sanding dust with a clean brush or a method suitable for the wood and intended finish. View the part from several angles under raking light, which can make scratches and uneven areas easier to spot. Check adjoining pieces together if they need to meet flush: a surface that looks smooth on its own may reveal a rounded edge or shallow dip at a joint.
Keep sanding dust out of your breathing area and follow the safety guidance for the wood and any existing coating. If you are working on an older object with an unknown finish, avoid sanding it until you understand what the coating may contain. For ordinary unfinished wood, a final inspection is often the most useful step: stop when the surface suits the project, rather than removing more material simply because you can.