What makes a tapestry shape?
In many kinds of weaving, a weft travels from one side of the cloth to the other. Tapestry weaving works differently: a weft may cover only the part of a row where its colour is needed, then turn back. These separate, or discontinuous, wefts let a weaver build shapes directly into the fabric rather than adding a design to its surface afterward.
The vertical threads held under tension on the loom are the warp. The weft passes over and under them in alternating paths. In a typical weft-faced tapestry, packed wefts largely hide the warp from view. The visible image comes from the placement of those wefts and the points where one colour gives way to another.
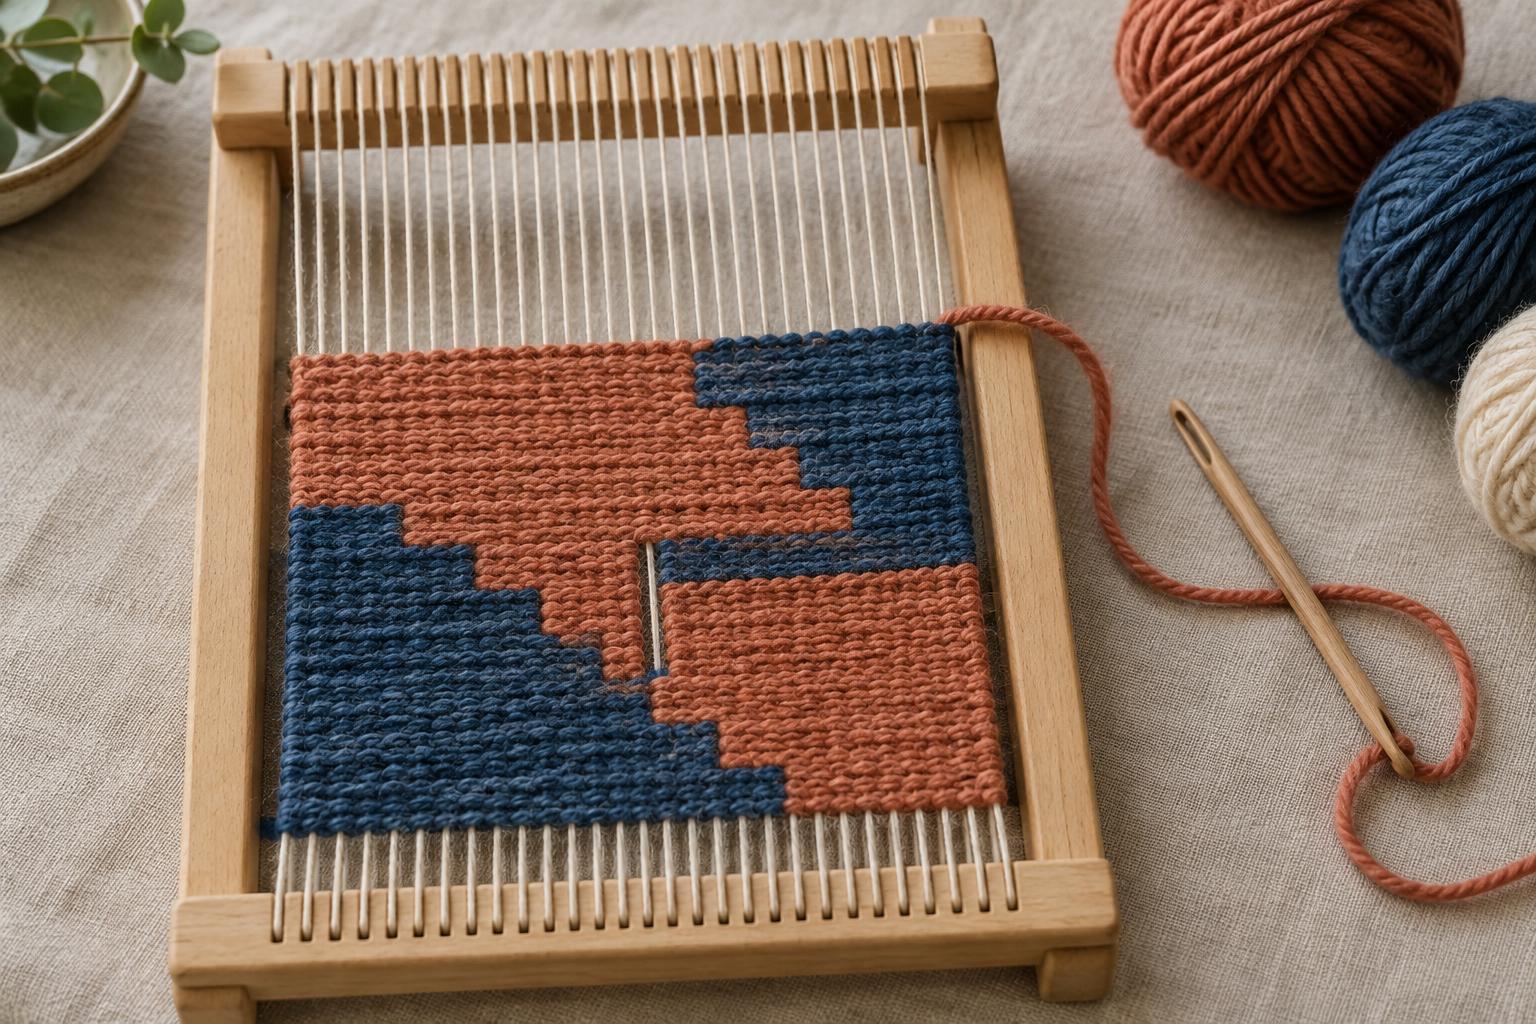
A simple way to picture the process is to imagine two blocks of colour sitting side by side. Each has its own length of yarn. Both wefts travel back and forth within their blocks, turning at the shared boundary. By moving that boundary a little on successive rows, the weaver can make a slope, a curve or a more irregular outline.
Set up a small, readable sample
A small practice piece makes it easier to see what each weft is doing. Choose a straightforward shape, such as a triangle against a contrasting background, and sketch its outline on paper. A drawing placed behind the warp can serve as a guide, but the woven shape will still be governed by the spacing of the warp threads and the thickness of the yarn.
Use a firmly tensioned warp and a weft that can be packed closely enough to cover it. Leave enough room on the loom to weave a few plain rows before the design begins; these establish a stable base. Wind manageable lengths of each colour rather than pulling from bulky balls through the warp.
As you weave, pass each weft through the appropriate opening, often called a shed, and settle it into place. Avoid pulling the yarn straight and tight across its area. A little slack gives it room to travel over and under the warp without drawing the edges inward. Pack the row firmly, but check the width of the piece often: even pressure matters more than force.
Move the boundary to build a shape
Start a triangle with one colour occupying a narrow span of warp threads and a second colour filling the space beside it. On later rows, let the triangle colour travel one or more warp spaces farther before turning back, and shorten the neighbouring colour’s path to match. Repeated gradually, this change makes the triangle wider. Reversing it narrows the shape.
The outline will not behave exactly like a pencil line. Warp threads provide regular positions for turns, while rows of weft provide steps in the other direction. A shallow diagonal usually needs a different rhythm of changes from a steep one. Instead of changing the turning point on every row by habit, pause and compare the emerging edge with your sketch.
Keep the weft for each area separate, even when several areas use the same colour. This gives you control over where a thread turns and avoids carrying long strands across the back. For a larger shape, you can add another length of yarn when one runs out; leave an end to secure within the woven structure during finishing rather than tying a bulky knot at the surface.
Choose what happens where colours meet
When two wefts turn around neighbouring warp threads without connecting, they create a slit between colour areas. A short slit may be a useful, clean boundary. A long vertical slit can open under handling, so it is worth deciding whether to join the colours as you weave or deal with the opening during finishing.
One option is to let both colours turn around the same warp thread. This shared turn is often called dovetailing. Another is to link the wefts to each other at the boundary before they travel back across their own areas. These approaches produce different-looking joins, so test them on a sample and keep the method consistent where a continuous edge matters.
Boundaries do not have to be solid. Short passes of one colour extending into another can create hatching, a sequence of small marks that softens a transition. It is still built row by row: each extension needs a clear return path and enough surrounding weft to hold it in place.
Read the cloth as you go
Look at the tapestry both close up and from a little distance. Up close, check for exposed warp, loose turns and uneven packing. From farther away, judge whether the shape reads as intended. If an edge seems to drift, adjust the next rows gradually rather than trying to force an abrupt correction into a single pass.
Watch the outer edges, or selvedges, as carefully as the internal boundaries. If they draw inward, the weft may need more slack before it is packed down. If a shape bulges, its wefts may be packed differently from those beside it. Small, regular checks make these issues easier to address while the work is still on the loom.
A finished sample is also a record of decisions. Notice which joins made a firm boundary, which turns left a gap, and how many rows it took to move an outline across a few warp spaces. Those observations are more useful than a perfect first triangle: they give you a practical basis for planning the next shape.